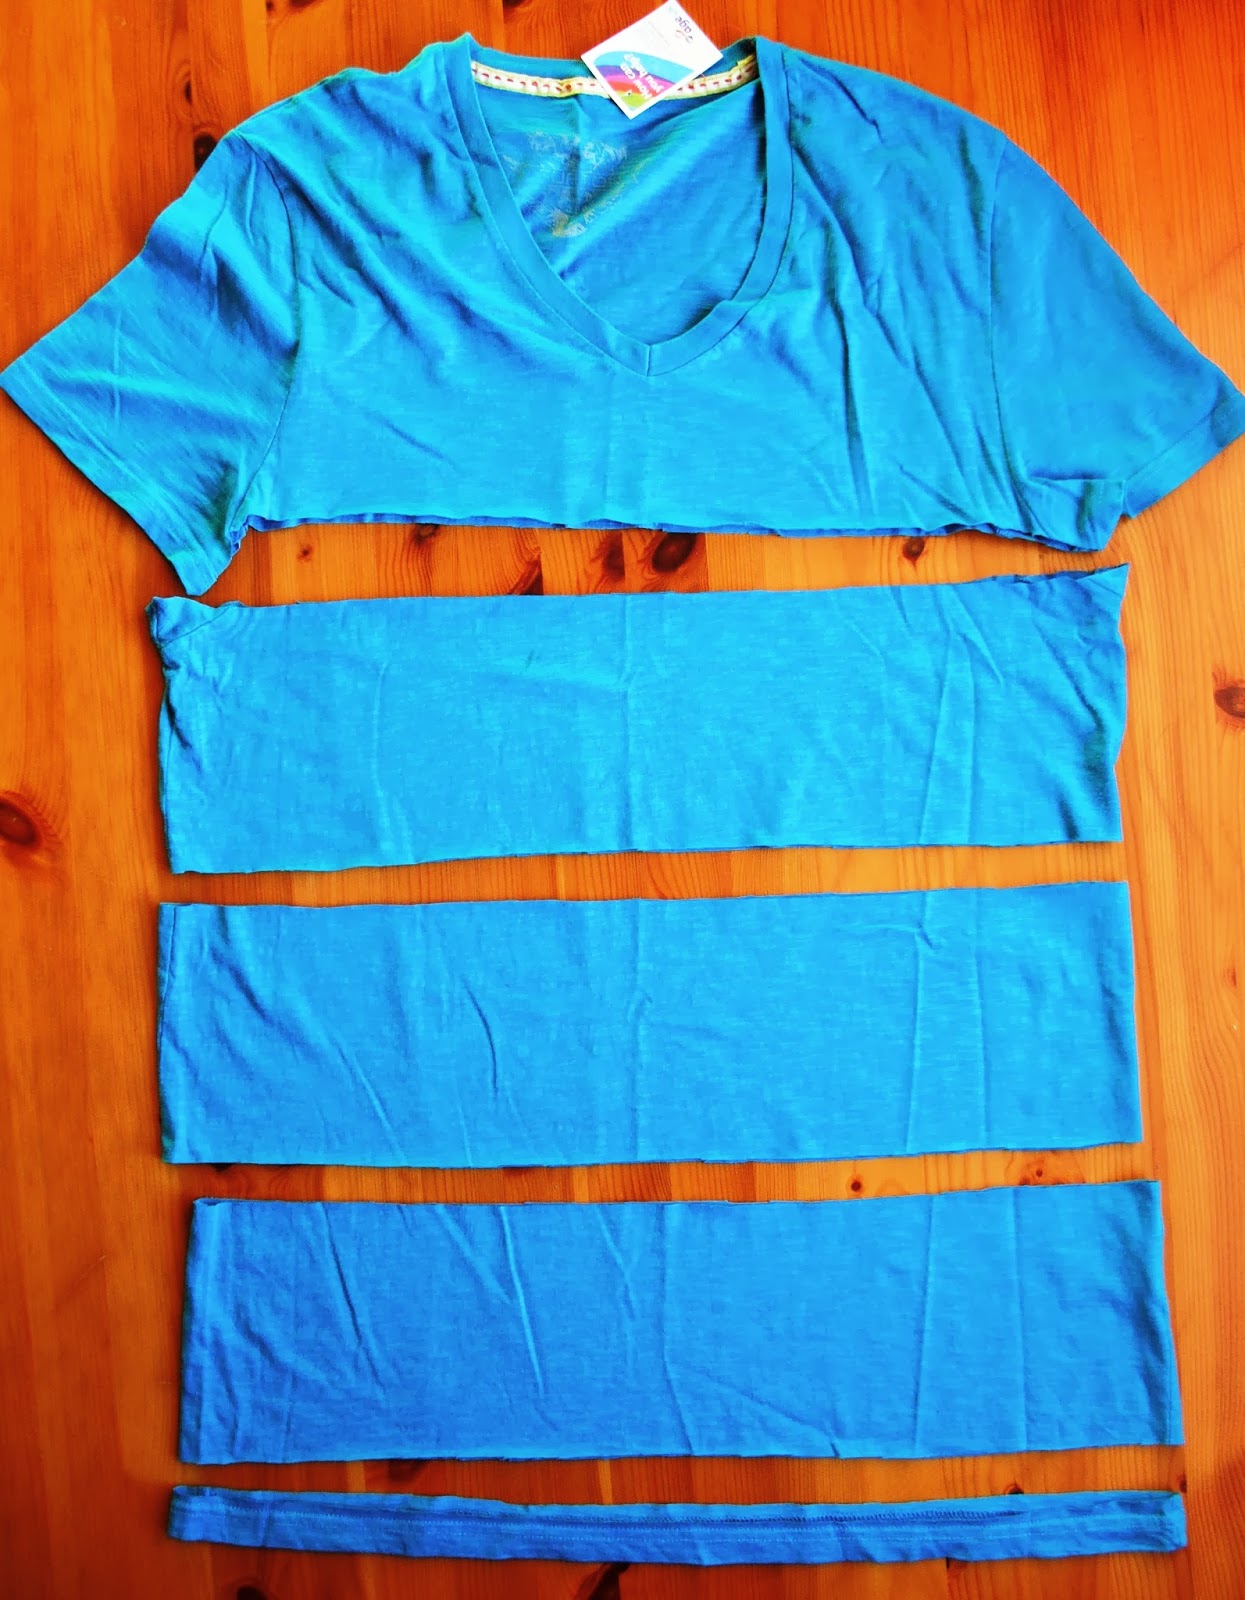
Hi. There were questions on 'how to' on yesterdays post, so I thought I would stretch it over to another post today. Thank you for your comments. Linda Metcalf asks about cutting techniques to make the strips. I don't have any cutting tools, just a large pair of scissors, and a ruler. For this rug I am using plain teeshirts, if they have a logo I discard it, but if you want to use every bit of the teeshirt you can do. First I remove the band at the bottom, then using a ruler as a rough guide, I cut 5.5 inch strips. When I get to the top I remove the seams, and neckline, I don't want them in my rug, but if you are mixing the colours you could use them as the stitching won't show. I then use the remaining straight bits. A teeshirt stretches sideways to allow for lumps and bumps. It's best if you cut your strips vertically as there is less stretch.


A Frugal Mrs asks how to attach the strips, and JanF asks about rug hooks. I have a rug hook, but I find it easier to use a crochet hook.

Push the hook through and out the other side.

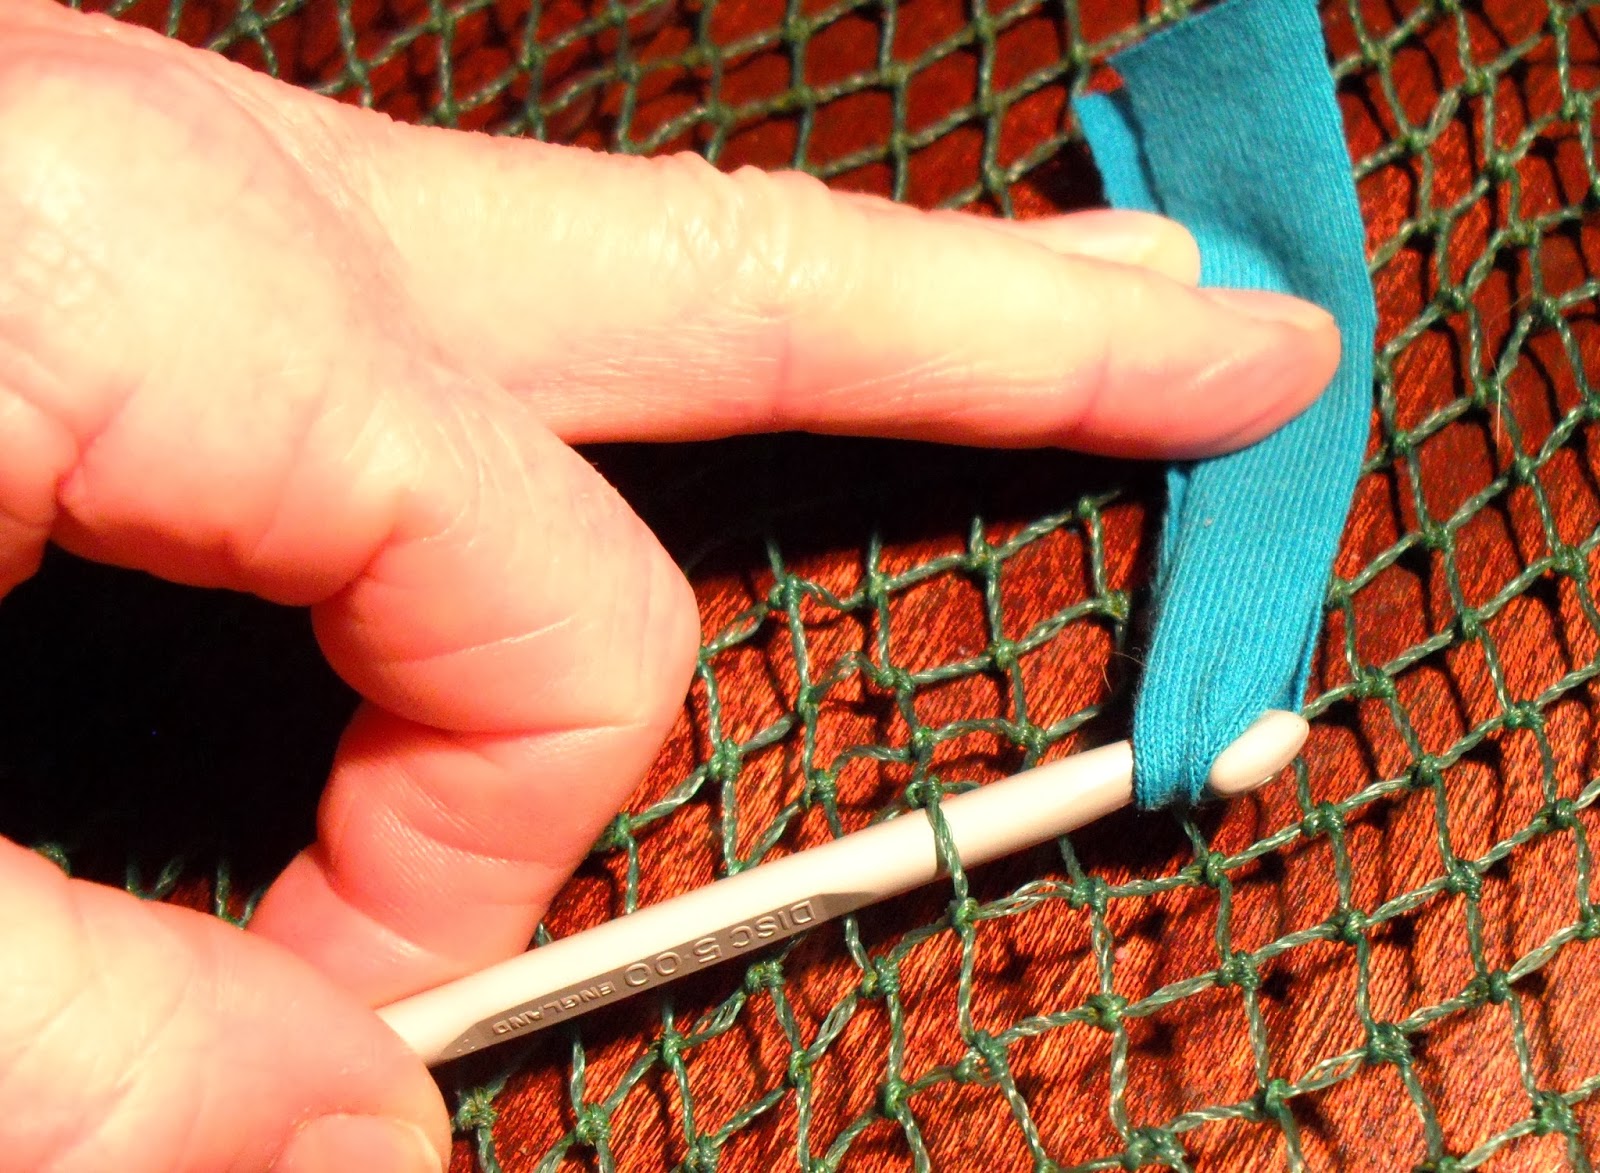


I've made a little video which might help.
For the backing you can use anything that has holes in, or is a loose weave to push the hook through. It must be fairly robust and strong because you need to tug at it as you work. It should also not be biodegradable, it needs to last a lot of years. You need to space your strips out so that they are not too sparse and the backing is visible from the front, but not too dense or your rug will be very heavy. There is no set formula for spacing, like every second hole, check as you go along.
Dreamer asks about the cut edges fraying and shedding loose threads. Teeshirts and sweatshirts don't fray, they are ideal for this. Danneke mentioned that they might be washable. If you make a large rug it would be far too heavy to put in a machine, and would take ages to dry. To get maximum life out of these rugs it's best not to use them where they are going to get dirty quickly. Not in a main thoroughfare where they are going to get trampled on by everyone who comes in and out. Hanging them over a washing line and giving them a good beating with a broom handle should be enough to keep the dust at bay.
That's all I can think of at the moment, I hope I have covered most points. If you are not sure that this is for you, try making a small cat or dog rug. Look for a hessian sack or vegetable net bags from a greengrocer, to practice on. Good luck, have fun.
Toodle pip.


Great tutorial .. thank you .. i will be looking out for all materials needed :)
ReplyDeleteAFM xx
Thank you Ilona, that was very clear. What a wonderful way to use up old teeshirts! I do remember some old rag rugs which my Grandma had made in the war years, cut up old coat somehow attached to sacking. Also, as you pointed out, I remember that they could not be washed - only beaten. There was nothing attractive about them ( except for being cheap!) but your project is going to be a thing of beauty!
ReplyDeleteLove the splodge effect. Very helpful video tutorial, I was half expecting to see little Heidi sitting on it as you were panning the camera!
ReplyDeleteLinda xx
Gr9 post Iiona!
ReplyDeleteX
Thanks for the post - I thought I was perhaps the only person who didn't know how to do this! Definitely going to have a go at this when I find a suitable piece of backing material.
ReplyDeleteKat x
That is a splendid set of instructions, clear & well illustrated. You've answered my queries.
ReplyDeleteBig thankyou Ilona & a matey squeak to your moggledots.
Metta.
Love the rug and a really good set of instructions :)
ReplyDeleteI could do this with my class of little grade threes, cool stuff Ilona.
ReplyDeleteThanks Ilona, I will start collecting old t shirts :)
ReplyDeleteThank you Ilona for making the video and the lovely instructions.
ReplyDeleteI am looking out for the materials to have a go.
I remember as a child when I visited my Grandma, she often had a rag rug on the go. She would work at one end and me at the other, I recall it was a pleasant way to pass on hour or two. Those rugs lasted forever, when she died, Mum threw them out, how sad.
Pam in TX.xx
Thank you so much for the instructions on how to make a rag rug Ilona, I remember my Grandmother making these rugs from scraps of fabric, so pretty and colourful they were, have wanted to try my hand at making them myself but never knew how until now, thanks again for sharing.
ReplyDeleteYou are so good at teaching Ilona. I can see loads of people including me having a go at this.
ReplyDeleteWendy (Wales)
So easy! Looks like a great winter-time project!
ReplyDeleteI love your video, and your accent! :)
ReplyDeleteI have also seen them made of fleece, that doesnt fray either. It also washes well and drys very quickly. Love the colours you are using, think I may make a bath mat if I can scrounge some old t shirts off the family. You are an inspiration my dear xx
ReplyDeleteGreat instructions. Natalie
ReplyDeleteA little bit random Ilona but do you like the word 'discrepancy'??
ReplyDeleteJane xx
Neither like nor dislike. Have no idea why you asked that.
DeleteGreat instructions. I have been working on one of these rugs for about a year. I pick it up when I find the need to keep my hands busy. My daughter told me that these rugs sell for over $60 in New York City.
ReplyDeleteso happy I asked as I was cutting in the wrong direction! Thank you for explaining all!
ReplyDeleteDear Ilona, Lovely rag rug. Could you tell me where you got your netting from? I would like to try making one myself. Thank you so much for showing us on your blog.
ReplyDeleteLove
Liz & Kath
Hi. The netting comes from inside a shipping container. I used to be a lorry driver for B & Q, and picked up containers from the docks and delivered the loads to warehouses. The netting was used to keep the load stable and not fall over during transit. This was 12 years ago. You wouldn't be able to find anything like this now, unless you know a lorry driver who delivers containers.
DeleteYou could look for an alternative. Try veg stalls at markets, ask if they have any old onion bags or similar. You would need several and join them together, because a single one opened out wouldn't be big enough. Most people use sack cloth to make the rugs.
Hi Ilona, people can use tapestry canvas, it has small holes on it, it's a kind of fabric you can use to make embroidery rugs, with cross stitch orothers. And there are also nets, I've find in plastic, but I'm trying to find similar to the one you used, as soon as those DIY stores open after confinement. I have lots of things to cut,( Tshirts and leggings with holes from the cats nails...), in the meantime, have been crocheting with scraps and yarn.
ReplyDeleteYour tutorial is super duper!! Thanks once again!!